Beef Wellington

Beef Wellington.
This is definitely not a classic beef wellington. I developed this recipe with creativity and compromise in mind. Traditionally, beef wellington should be made with filet mignon or a full tenderloin. A tenderloin would be too large to cook well in a toaster oven. And the cost and availability of filet mignon lead me to consider possible substitutions. In this example, I used beef country ribs. If you aren’t familiar with country style ribs, they are cut from the rib end of a loin, in the case of pork, or chuck roll, in the case of beef. Country ribs usually have a lot of marbling and may need to be trimmed. They are also cut in a different direction as you can see from the picture. As far as cheap cuts of meat go, this one is probably the best substitute for filet as far as fork tenderness goes because of the grain direction. The most important thing to understand is that you can exchange the cut of meat. Just look for something that has some marbling,you know is not too tough and is single-portion sized. Examples of tough meats to avoid are skirt and hangar steaks. If you’re feeling really creative, you can even exchange the filet for fish or tofu if you’re vegetarian!
Once you’ve chosen your meat, the preparation is actually very simple.
Ingredients for 5 servings
1 tbsp butter or oil
5 pieces of chosen meat
1/2 onion – chopped
1 portion puff pastry dough – thawed
1 full batch spinach pesto
The first step is to sear the meat. (If you are using fish, tofu or any other quick-cooking protein, skip this step) You can do this using a pan on your stove or in the pot of your rice cooker. Melt the butter and quickly sear each side of the meat using high heat.

Seared meat.
You only want to brown the outside of the meat. Do not cook it all the way through. This will help ensure it cooks through in the toaster oven, give it layers of texture and keep the meat moist. After it has browned on each side, remove the meat to a plate and let cool slightly. Reserve the remaining butter in the pan or rice cooker pot and use it to sauté the onions. When the onions have just begun to brown, remove from heat and fold them into the pesto.
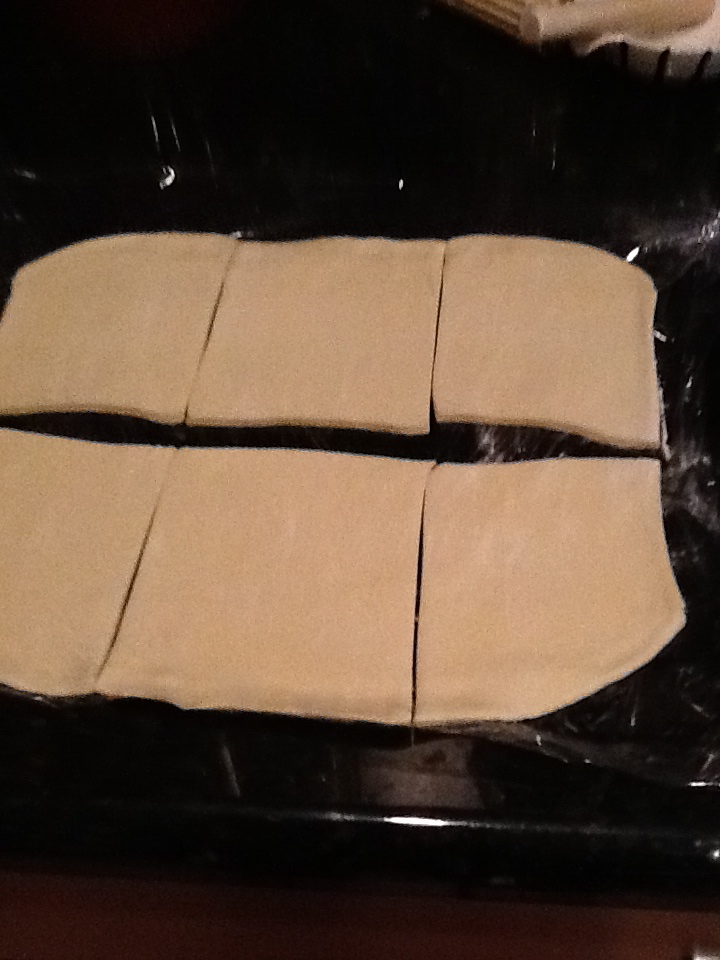
Roll out the pastry puff. The dimensions will depend on the size and shape of the protein you have chosen to use. You will need to cut the dough into shapes that will cover the meat completely. For my example, I rolled out the dough to a rectangle of about 12″ x 15″ (31cm x 38cm) and slice it into 5 12″ x 3″ rectangles.
Spread the pesto along the center of each section of dough covering an area just larger than the meat. Place one piece of meat on the center of each piece of pastry.
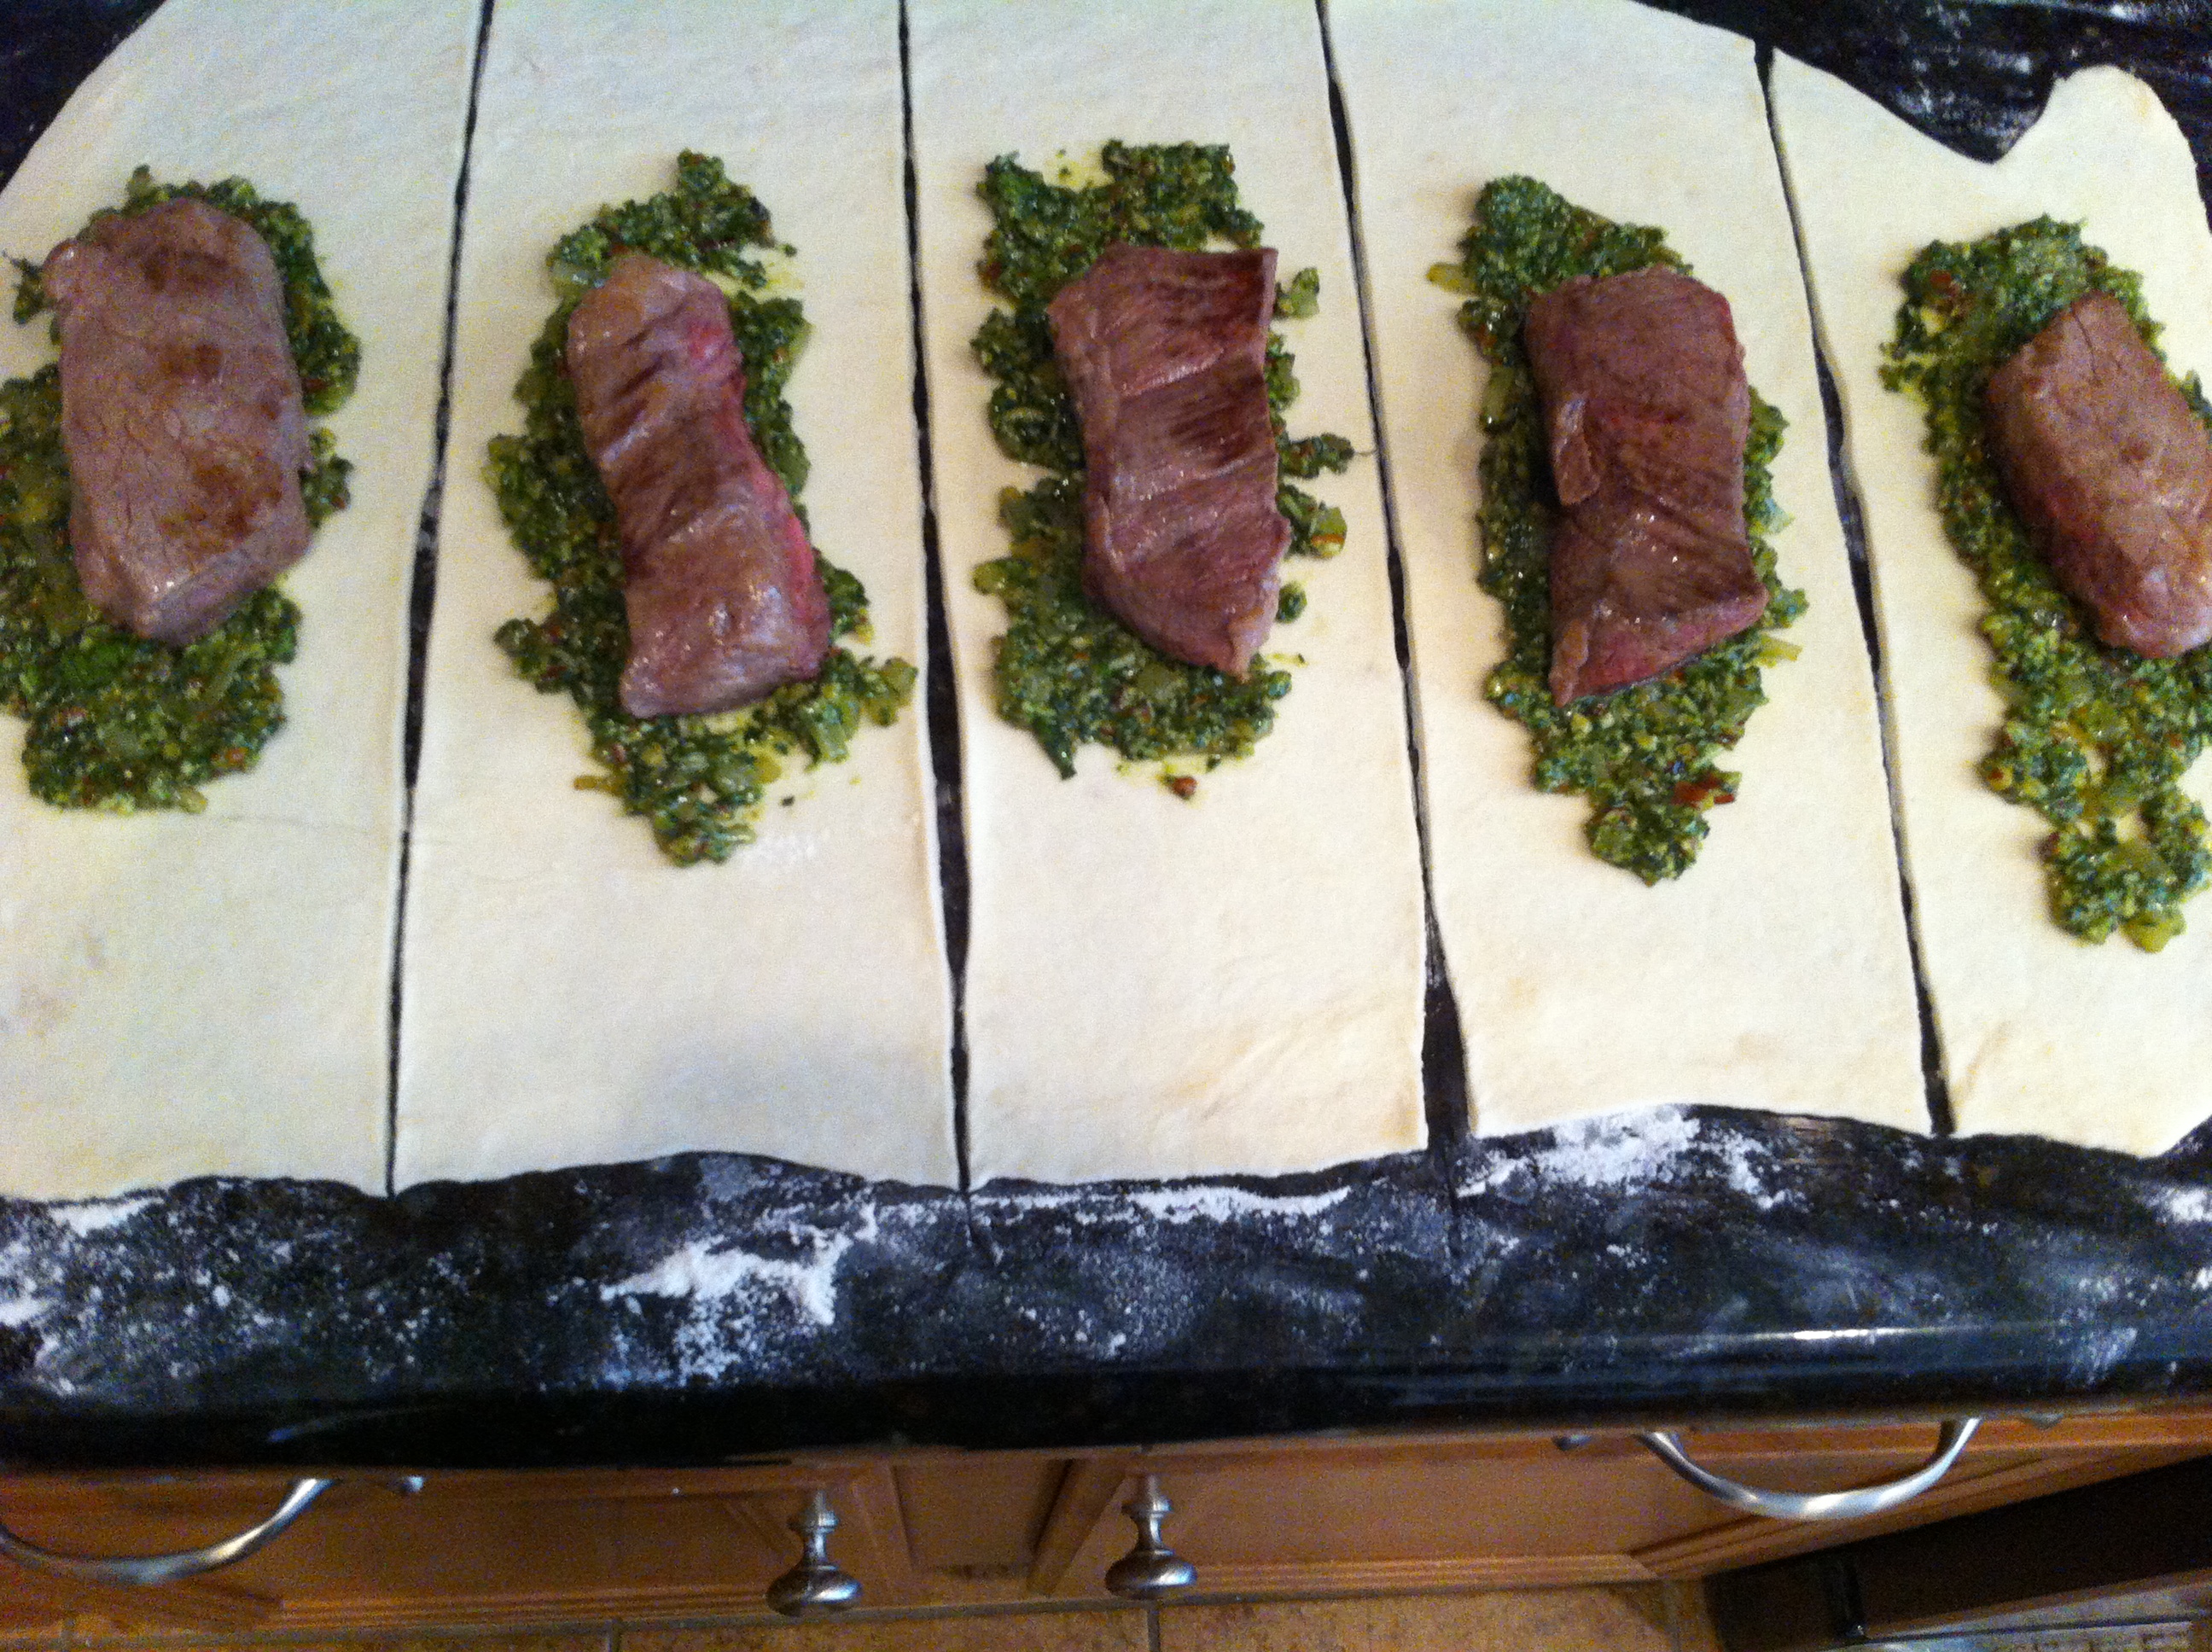
Meat and pesto placement on pastry.
Now it’s time to wrap the individual beef wellingtons. Because we’ve gotten creative with our meat choice, we really can’t follow any traditional wrapping techniques. The only rule is to cover the filling entirely and seal the edges. The edges can be sealed simply by dipping your finger in water and then rubbing the water across the area that you want to stick together.

Wrapped beef wellington.
Once you have all of your beef wellingtons wrapped, place them on a toaster oven baking sheet with sealed edges facing down. Now it’s time to slice in steam vents. I cut a little criss-cross pattern on mine, but you can do anything you like on yours. These cuts are important though. Trapped steam will cause the puff pastry to become soggy inside or can lead to the top puffing up too high and over cooking.
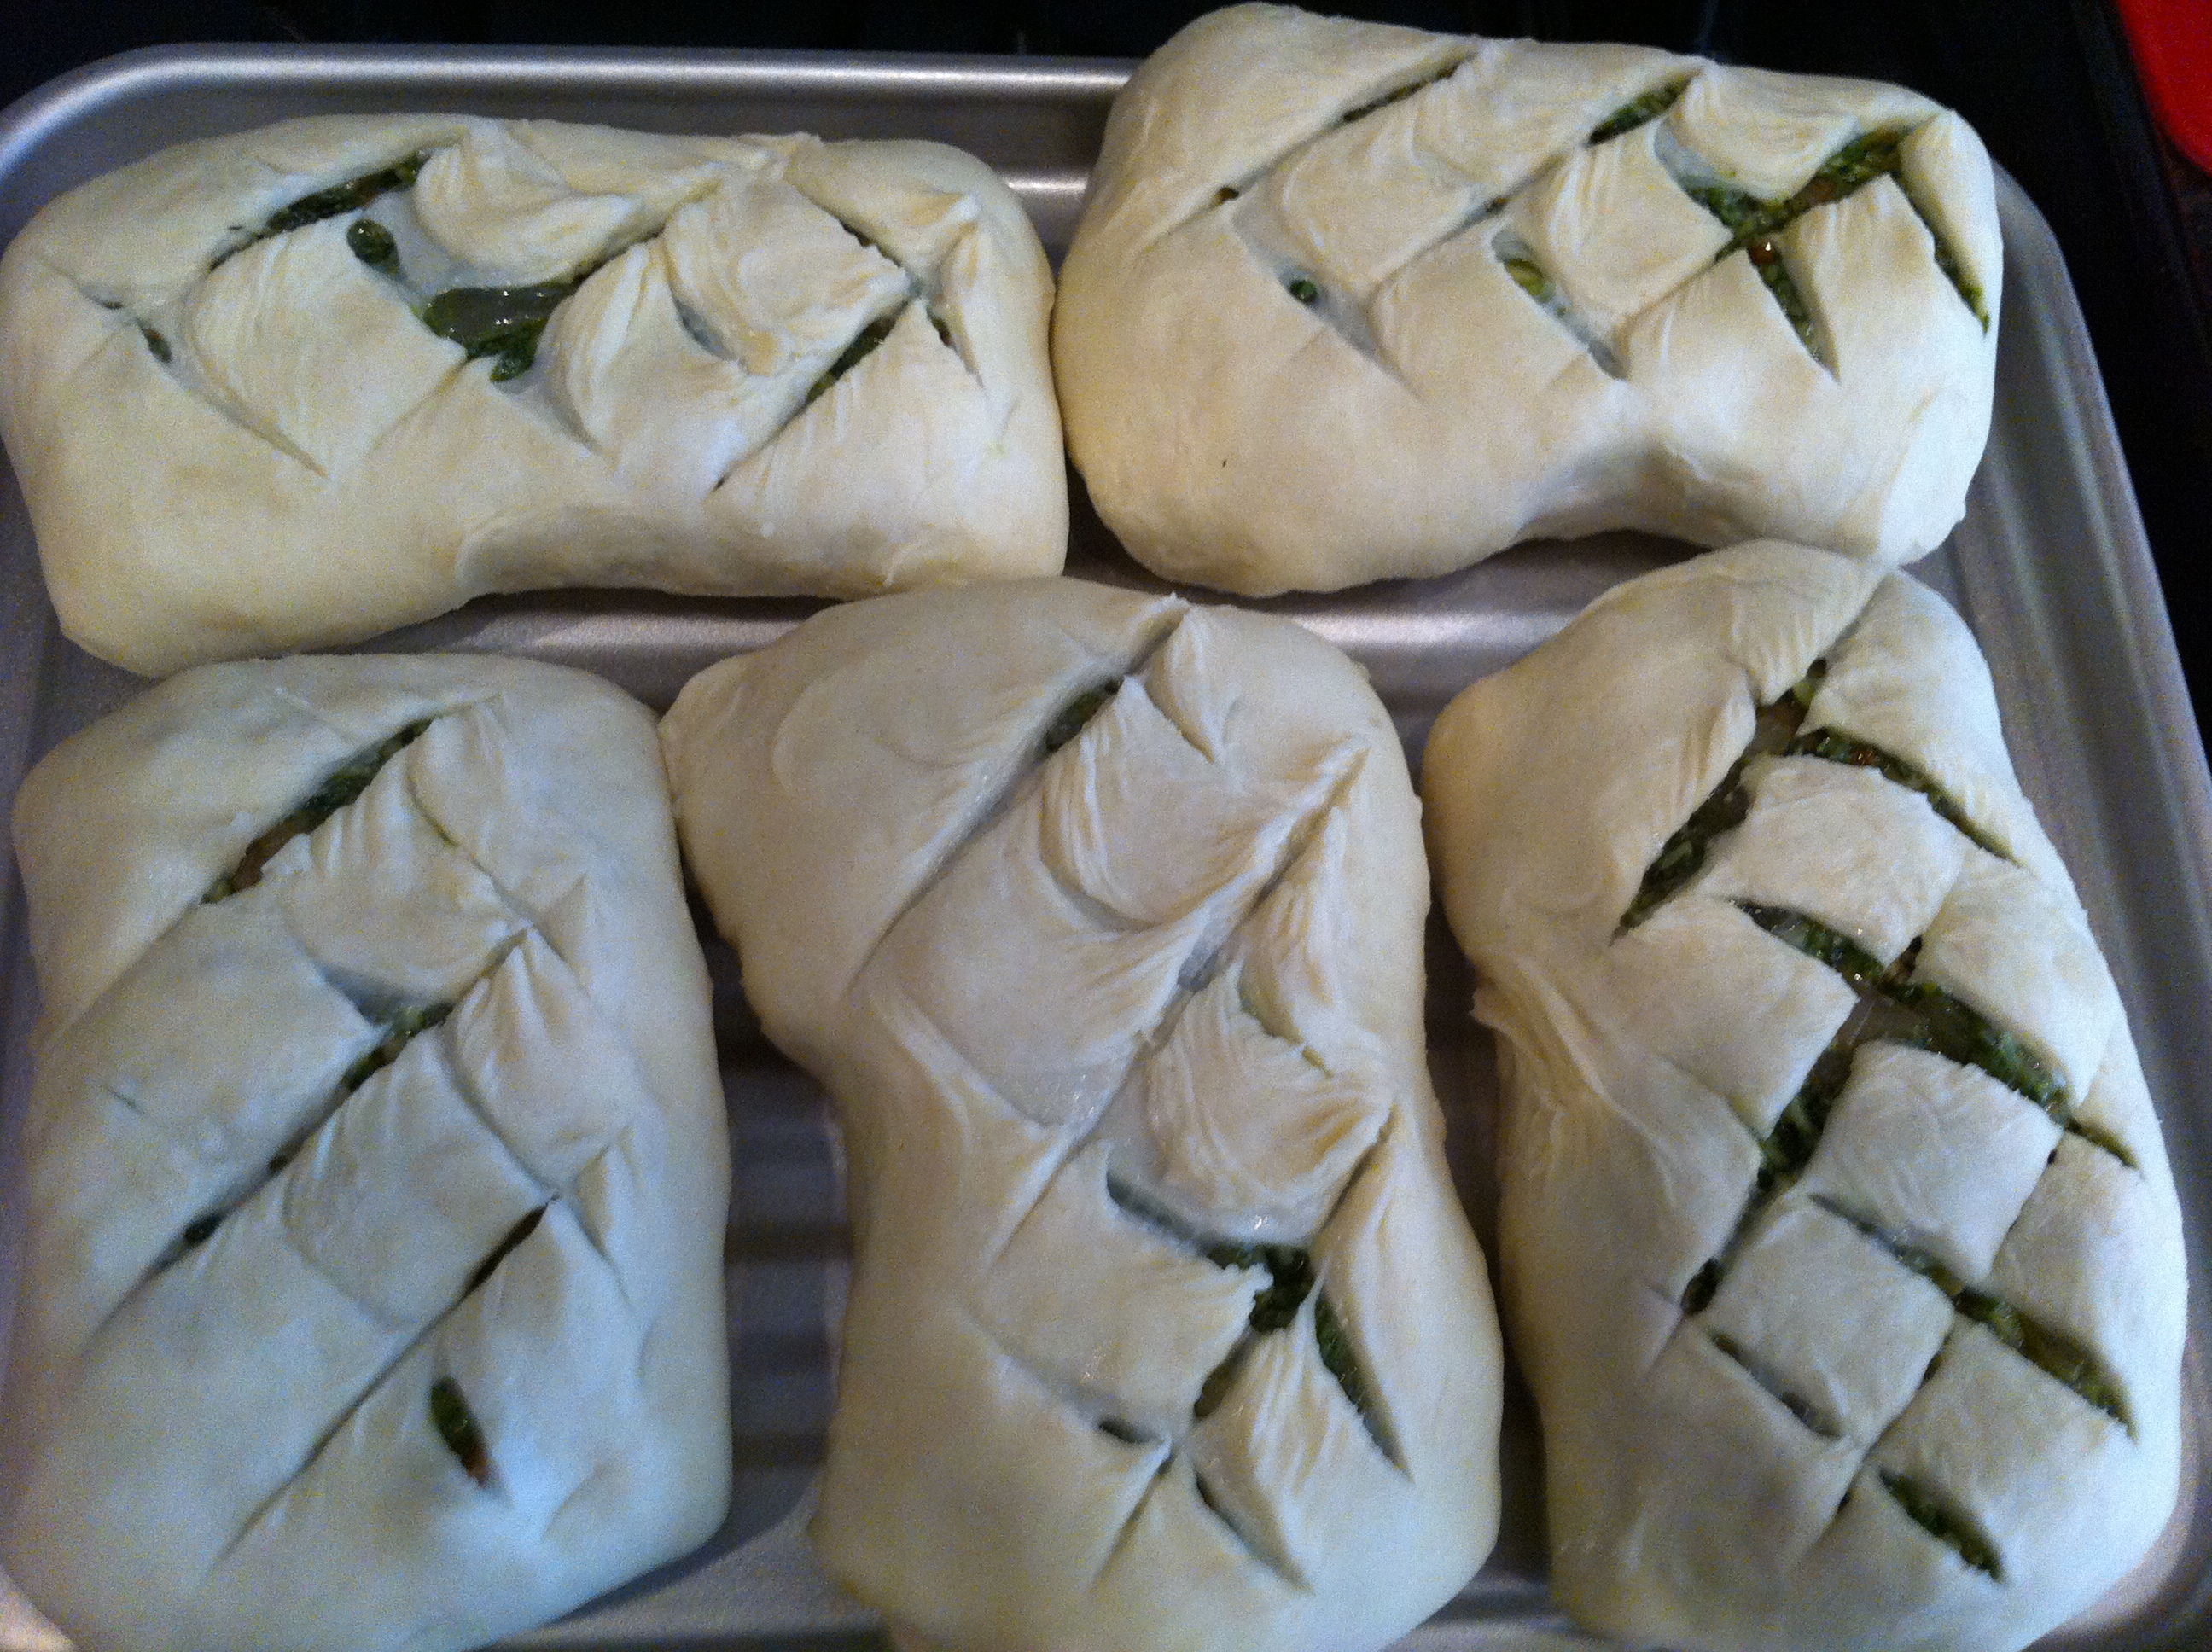
Beef wellingtons ready for baking.
Now put them in the toaster oven set to about 300 F for 40 minutes. You will need to use top and bottom heat sources to cook this evenly. Depending on your toaster oven, you might need to switch back and forth between heat sources every five minutes, or set the heat to self-regulate. As always, to cook it as evenly as possible, rotate the baking sheet during the last 10 minutes of cooking. When they are evenly golden brown, remove them from the toaster oven and let them rest for 5 – 10 minutes before serving.

Golden brown beef wellington.